Merge AVHDX Hyper-V Checkpoints
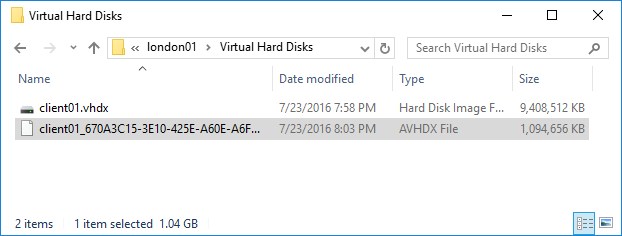
When you create a snapshot of a virtual machine in Microsoft Hyper-V, a new file is created with the .avhdx file extension. The name of the file begins with the name of its parent VHDX file, but it also has a GUID following that, uniquely representing that checkpoint (sometimes called snapshots). You can see an example of this in the Windows Explorer screenshot below.
Creating lots of snapshots will result in many .avhdx files, which can quickly become unmanageable. Consequently, you might want to merge these files together. If you want to merge the .avhdx file with its parent .vhdx file, it’s quite easy to accomplish.
PowerShell Method
Windows 10 includes support for a Merge-VHD PowerShell command, which is incredibly easy to use. In fact, you don’t even need to be running PowerShell “as Administrator” in order to merge VHDX files that you have access to. All you need to do is call Merge-VHD with the -Path parameter, pointing to the .avhdx file, and the -DestinationPath parameter pointing to its parent .vhdx file.
Here’s a simple example that uses PowerShell Splatting [YouTube] to pass in parameters to the Merge-VHD command:
 $Merge = @{
  Path = 'c:\artofshell\client01_670A3C15-3E10-425E-A60E-A6F93DF13E20.avhdx'
  DestinationPath = 'c:\artofshell\client01.vhdx'
 }
 Merge-VHD @Merge
If you don’t have the Merge-VHD command available, you might receive an error message similar to the following:
Merge-VHD : The term 'Merge-VHD' is not recognized as the name of a cmdlet, function, script file, or operable program. Check the spelling of the name, or if a path was included, verify that the path is correct and try again.
If you get this error message, then you’ll need to install the Hyper-V PowerShell module that’s included with Windows 10. To install this module, simple launch an elevated PowerShell session, and run this command:
Enable-WindowsOptionalFeature -Online -FeatureName Microsoft-Hyper-V-Management-PowerShell
After installing the Hyper-V PowerShell module, go back and run the Merge-VHD command again.
Hyper-V Console Method
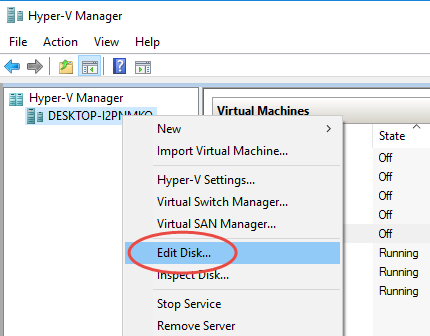
You can also use the Hyper-V console in Windows 10 to perform the merge operation. The first thing you’ll want to do is open the Hyper-V console. Next, right-click the Hyper-V host and click Edit Disk.
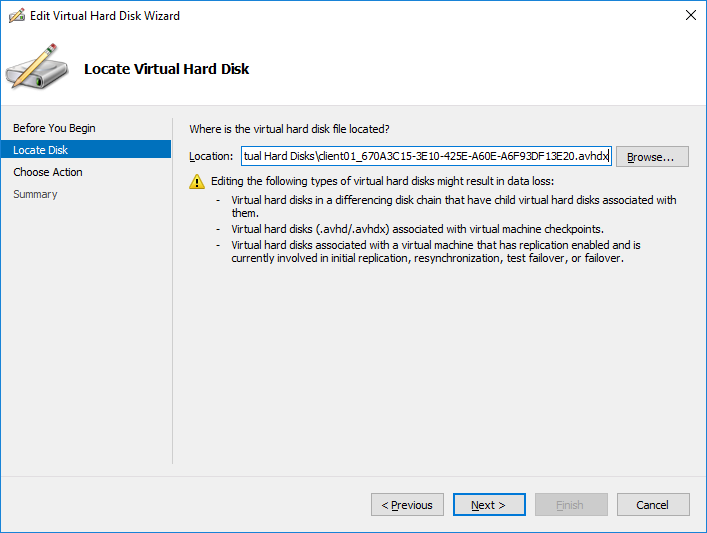
After clicking Edit Disk, you’ll be presented with a wizard, where you’ll point Hyper-V to the .avhdx file that you want to merge.
IMPORTANT: Select the .avhdx file, and not the .vhdx file, otherwise you won’t see the Merge operation available!
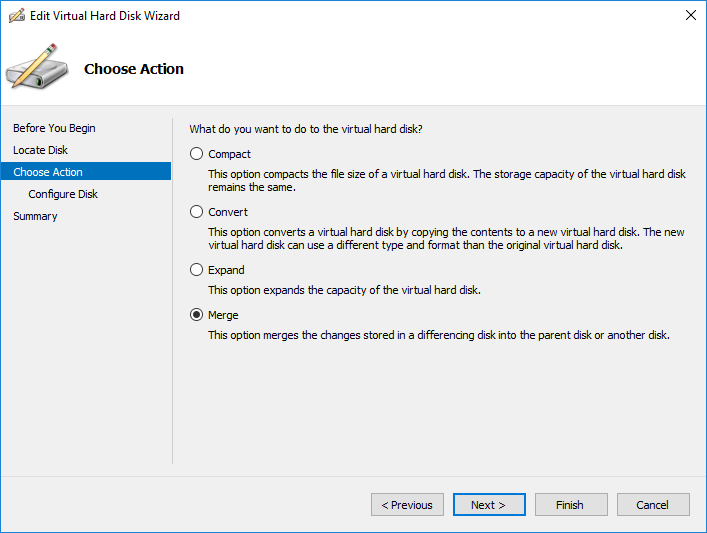
On the next wizard screen, select the Merge action.
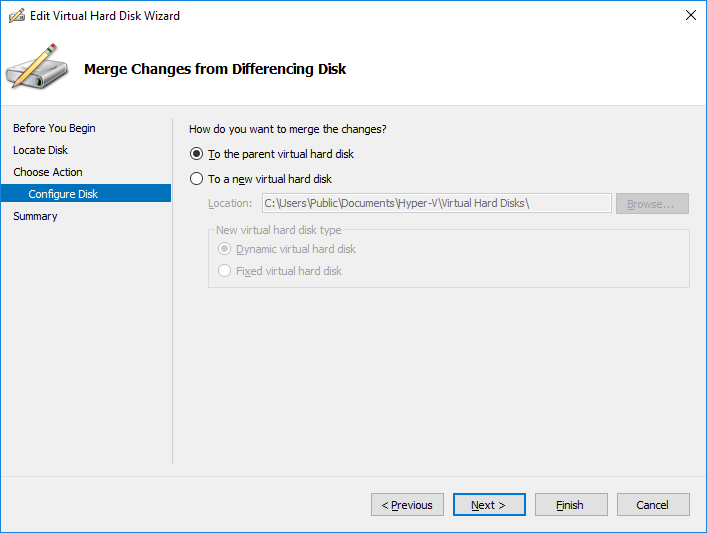
Next, you’ll need to choose the destination for the merge operation. In most cases, you’ll choose the To the parent virtual hard disk option.
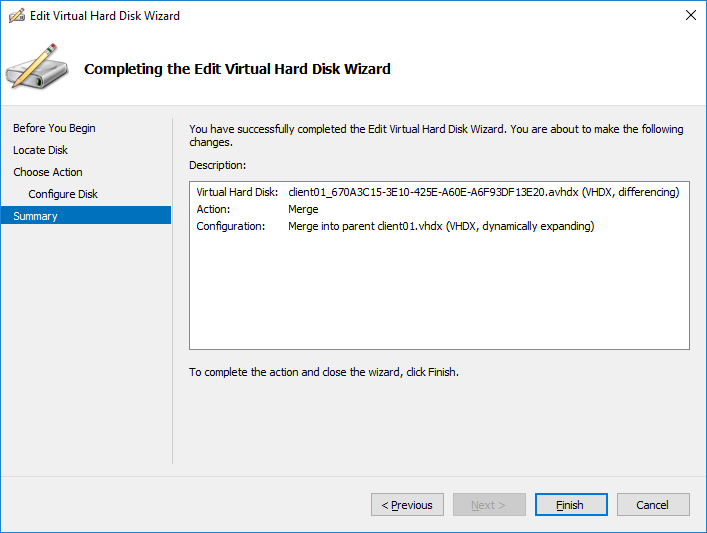
Finally, on the Summary page of the disk editing wizard, just complete the wizard, and it will merge your disks for you. That’s all there is to it!
